How to Enable IPv6 Access on Alibaba Cloud ECS
By default, the CentOS image on Alibaba Cloud comments out IPv6. Enabling it requires using a dual-stack IPv4 and IPv6 network, which needs to be applied for under beta testing—this isn’t very convenient. Instead, we can use an IPv6 tunnel provided by tunnelbroker.net to enable IPv6 access. Also, if you’re on campus and using China Telecom, you can get an IPv6 address directly. So, if the Alibaba Cloud server supports IPv6, you can browse the web for free.
1. Enable IPv6 Access
vi /etc/sysctl.conf
Uncomment the following three lines and change the value from 1 to 0, as shown below:

Then reload the configuration with:
sysctl -p
IPv6 should now be supported.
2. Get an IPv6 Address via Tunnelbroker
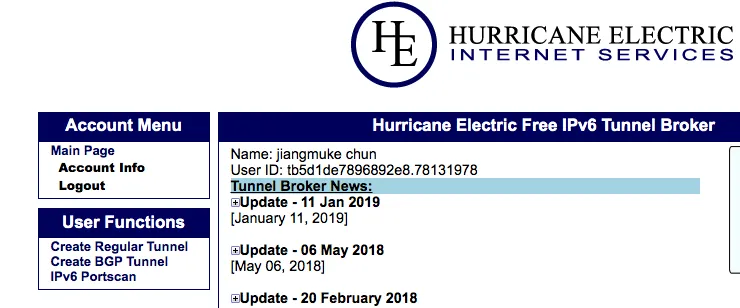
Go to https://tunnelbroker.net and register for an account. Make sure your password is complex enough or the registration may fail.
After logging in, go to the bottom left and select “Create Regular Tunnel”:
Enter your ECS public IP address.
⚠️ Note: ECS must not block ping (ICMP), or tunnelbroker will refuse to create the tunnel.

Scroll to the bottom and click “Create Tunnel” to finish setup.
Go to the tunnel configuration page:
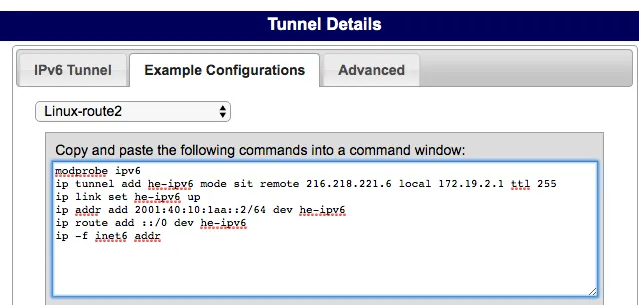
⚠️ Important: Replace the default address with your ECS internal IP address (mine starts with 172.19), or it won’t connect from the outside.
Copy the provided configuration commands and run them in your ECS shell.
Use ifconfig to check the network setup — you should now see an IPv6 address:

To test, try:
wget -6 www.bobobk.com
If it returns content successfully, then IPv6 setup is complete.
3. Modify Nginx Config to Support IPv6 Access
📌 Note: If you’re using Cloudflare CDN, IPv6 access is enabled by default.
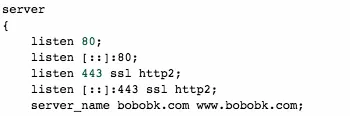
Open your Nginx configuration file. To listen for IPv6, add:
[::]:80;
[::]:443;
Final configuration should look like this:
That’s it—everything is now configured.
Summary
This guide walks through enabling IPv6 on Alibaba Cloud ECS running CentOS 7 by setting up an IPv6 tunnel via Tunnelbroker, allowing full IPv6 access on your server.
- 原文作者:春江暮客
- 原文链接:https://www.bobobk.com/en/377.html
- 版权声明:本作品采用知识共享署名-非商业性使用-禁止演绎 4.0 国际许可协议进行许可,非商业转载请注明出处(作者,原文链接),商业转载请联系作者获得授权。